The PS1 look is back in indie horror: small textures, crisp pixels, a slightly wobbly world and fog that hides what is coming. Godot 4 can do all of it, but its defaults are made for modern games, so a 64 px texture comes out blurry or smeared unless you change a few settings. This guide walks through the setup we use for our own demo scenes, step by step.
What makes a texture look PS1
The console drew small textures, most often 64x64 or 128x128 pixels, with no filtering between texels, in 15-bit colour (5 bits for each of red, green and blue). To hide the colour banding it dithered the output. A texture that looks right in that style keeps those limits on purpose:
- Small sizes: 64 px for walls and floors seen from a distance, 128 px for things the camera gets close to.
- Few colours, with an ordered dither instead of smooth gradients.
- Hard alpha: a pixel is either fully visible or fully cut out, never half transparent.
- Seamless edges, because one texture is repeated across a whole wall.
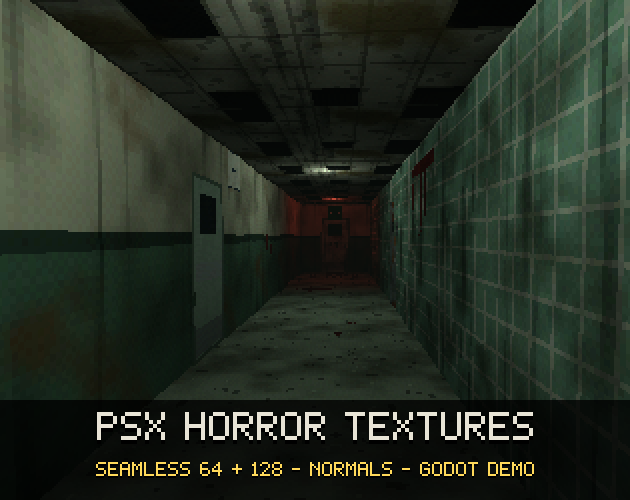
Our PSX Horror Textures are made exactly this way: every texture is drawn at 64 and at 128 px, reduced to 15-bit colour with a 4x4 ordered dither, and cut-out alpha only.
Step 1: import settings that keep every pixel
Godot imports PNG files as textures, and when it sees a texture used on a 3D mesh it can switch it to VRAM compression. Compression works in 4x4 blocks, which is the same size as a dither pattern, so it muddies exactly the pixels you care about. Mipmaps blur a small texture at a distance as well. Turn both off for the whole project in project.godot:
- Compress > Mode: Lossless.
- Detect 3D > Compress To: Disabled, so a texture used in 3D stays lossless.
- Mipmaps > Generate: off.
In the editor you can set the same values once as the default for textures in the Import dock (Preset > Set as Default). Our demo project ships with these defaults in its project.godot, so every texture you drop in is imported the right way.
Step 2: nearest filtering on the material
Filtering is set on the material, not on the texture. On a StandardMaterial3D, set Sampling > Filter to Nearest. In a shader, declare the texture with the filter_nearest hint and add repeat_enable so it tiles. With nearest filtering each texel stays a sharp square however close the camera gets.
Set the UV scale so that one texture covers a sensible area. A good rule for 64 px textures is 2 x 2 metres per repeat, which gives 32 pixels a metre: a door then is 1.2 x 2.4 metres and a 64x128 door texture fits it without stretching.
Step 3: render at a low resolution
Crisp textures on a 4K screen still look modern, because the screen resolution is so much higher than the texture resolution. Render the game at a low resolution and scale it up with whole numbers. In Project Settings set the viewport to 480x270, the window override to 1440x810 (or anything that is a whole multiple), and Stretch > Mode to viewport. Godot then draws the 3D world at 480x270 and scales it up without smoothing.
- 480x270 scales to 1920x1080 at exactly 4x.
- 320x180 is even chunkier and scales by 6x to 1080p.
- Turn MSAA off: edge smoothing works against the look.
Step 4: vertex snapping and affine warping
The PS1 stored vertex positions on a coarse screen grid, which is why its polygons seem to jitter when the camera moves. You can copy that in a spatial shader: compute the clip position yourself in vertex(), divide by w, round x and y to a grid (for example 240 lines high), multiply by w again and write it to POSITION. A snap grid of 240 lines is subtle; 120 lines is very wobbly.
The console also mapped textures without perspective correction, called affine mapping, so textures bend on large polygons. To copy it, multiply the UV by w in vertex() and divide by w again in fragment(). It looks strong on big faces, so subdivide them (a QuadMesh with subdivide width and depth of one per metre works) or mix it in only partly. Our demo shader has both effects as uniforms, with affine warping off by default.
Step 5: tiling without visible repeats
A seamless texture can still look repetitive when it covers a long corridor. Three tricks break it up without more texture memory:
- Mix a clean and a dirty version of the same wall along its length.
- Place decals on top: blood drips, water stains, cracks or cobwebs on simple quads with alpha cut-out, a centimetre in front of the wall.
- Change the floor or the ceiling every room, and let fog hide the far end.
Decals need the alpha scissor (or a discard below 0.5 in a shader) rather than alpha blending, so they sort correctly and keep hard edges like the rest of the scene.
Step 6: light and fog do the rest
PS1-style horror scenes are mostly dark. A few omni lights with a short range, a low ambient colour and a little distance fog make the textures feel heavy. A light that flickers by switching its energy between full and almost nothing on a noise curve sells an old fluorescent tube better than any texture.
Normal maps are optional in this style. They add shape to bricks, tiles and rivets under moving lights; keep their strength low so the flat pixel look stays. Godot and Blender read normal maps with green pointing up (OpenGL); Unity and Unreal expect it flipped.
Building levels from the textures
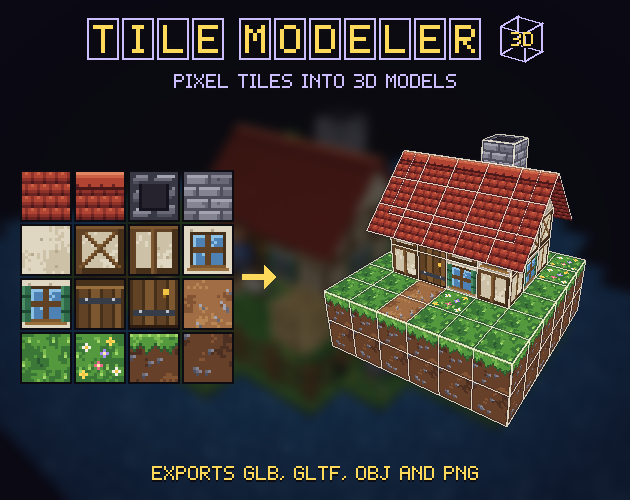
You do not need a full 3D modelling program for a PS1-style level. A tile-based editor like our Tile Modeler places textured tiles and blocks on a grid and exports GLB for Godot. Load a texture atlas as its tileset and set the tile size to match the atlas cell (64, 32 or 16 px). For sound, short chip-style effects such as Retro Sound Effects fit the era better than modern recordings.
A quick checklist
- Textures 64 or 128 px, 15-bit colour, cut-out alpha.
- Import: lossless, no VRAM compression, no mipmaps.
- Material: nearest filter, repeat on, 2 metres per 64 px.
- Viewport 480x270 or 320x180, stretch mode viewport, MSAA off.
- Optional: vertex snap, affine warp on subdivided faces.
- Decals and dirty versions against repetition; fog and short lights for mood.
Gridwright packs can be used in commercial games; you may not resell the files themselves. Packs released from October 28, 2026 ask for a credit: “Art by Gridwright” with a link (each pack’s LICENSE.txt says which applies). More on that in can I use game assets in a commercial game.