A modern city is one of the most useful settings a game can have. City builders, tycoon games, life sims, traffic games and modern RPGs all need one. It is also a setting that shows mistakes quickly. Everyone knows what a road junction, a pavement or an office block looks like, so a road marking that does not meet the next one, a car facing the wrong way or a building with a random height stands out at once.
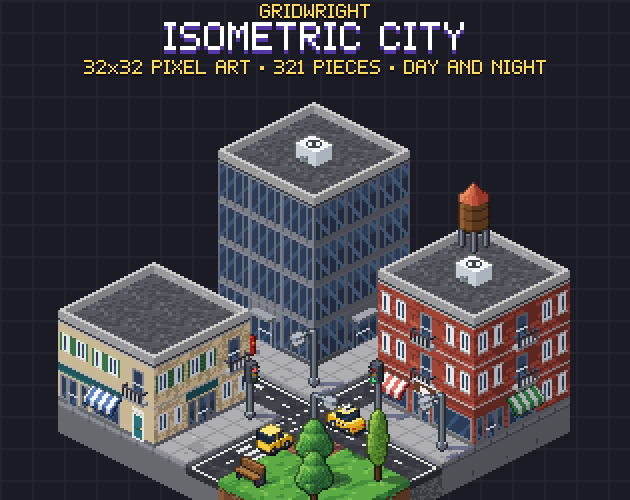
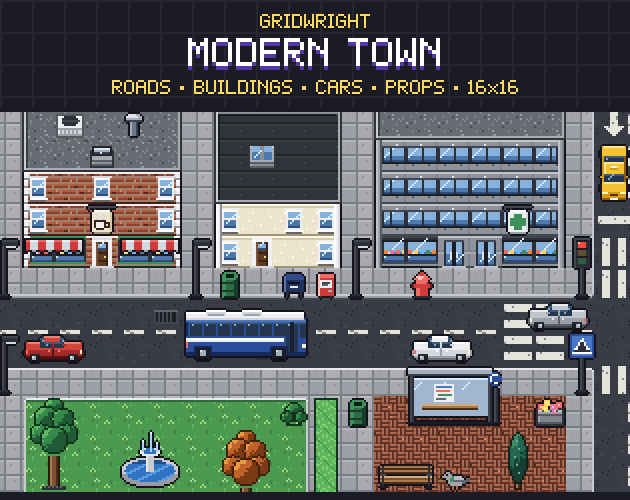
This guide walks through making a modern city map in pixel art, from choosing the view to the night version. The examples use Gridwright Isometric City for an isometric map and Gridwright Modern Town for a top-down one, but the same steps work with any city tileset.
1. Choose the view first
Decide between top-down and isometric before you collect a single sprite, because the two do not mix. A top-down city on a 16x16 grid is quick to build, easy to read and fits games where the player walks or drives around a large map. An isometric city on a 2:1 diamond shows the fronts and the sides of buildings at once, so streets look deep and tall buildings feel tall; it suits city builders, management games and anything where the player looks at the city more than through it. Our comparison of isometric and top-down pixel art goes through the trade-offs in more detail.
2. Fix the grid and the scale
Every piece of the city has to share one grid. In the isometric examples here each cell is a 32x16 diamond and a ground block is 16 pixels tall. A top-down city usually works on 16x16 tiles. Pick the size once and check every new pack against it; a road drawn for a 64x32 diamond will never line up with buildings drawn for 32x16. If you have not chosen a size yet, see how to choose a tile size.
Scale matters as much as the grid. Decide how tall one storey is, how long a car is and how wide a road is, and keep to it. In Isometric City a storey is 20 pixels tall, a car is one cell long and half a cell wide, and a road cell holds two lanes. Those three numbers decide how dense the city feels: shorter storeys and smaller cars make a sprawling city-builder view, taller ones a close-up street.
3. Lay the roads before anything else
Roads are the skeleton of a city map, so they go down first. The easiest way to build them is with pieces that join by their neighbours. Each road cell looks at its four sides and asks which of them continue as road. Those four answers make a number from 1 to 15, and each number has its own piece: a straight with a dashed centre line, a bend, a T junction, a crossroads or a dead end. You place road cells and the right markings follow.
- Straight pieces carry the centre line and an edge line on each side, so long roads read clearly.
- Junctions and crossroads drop the centre line, so traffic can turn.
- Zebra crossings go on straight cells next to a junction, where people cross.
- Parking bays sit on plain asphalt beside the road, opening towards the lane cars come from.
Make the markings continue from cell to cell. If the dashes of one straight piece start where the dashes of the next one end, a long road looks drawn by hand rather than stamped. In Isometric City the markings are flat overlays laid on top of asphalt blocks, so the same road can run over any ground.
4. Give the pavement a kerb
A small height difference does a lot for a city map. When the road surface sits a couple of pixels lower than the pavement, the edge of the pavement shows as a kerb wherever the two meet, and every street gets a clean border without extra edge tiles. In Isometric City the asphalt blocks are 14 pixels tall and the pavement, lawn, plaza and concrete blocks are 16, so the kerb appears by itself. Fill the blocks between the roads with pavement, lawns for parks and gardens, and plaza pavers for squares in front of offices.
5. Build the buildings from storeys
A city needs many buildings of different sizes, and drawing each one by hand quickly becomes the bottleneck. A storey kit solves it. Each storey is one cell: a ground floor with windows, a door or a shop front, and upper floors with windows, a balcony or a blank wall. Stack storeys on a cell to any height, fill a rectangle of cells the same way, and the cells become one building, because a face that has another cell of the building in front of it is simply covered. Window bays repeat every cell, so long facades run on without a seam.
- Mix facades by district: brick and stucco for an old town, concrete for housing blocks, glass for the business district.
- Put shop fronts and awnings on the ground floor along the main street and plain doors on the side streets.
- Vary heights in steps: low shops near the front of the map, towers towards the back, so tall buildings do not hide the streets.
- Finish every building with a roof that joins the roofs beside it, and add a few rooftop props such as air conditioners, water tanks or solar panels.
Isometric City has four facades (red brick, cream stucco, grey concrete and a glass office) with six ground-floor and four upper-floor pieces each, 16 flat roof pieces that join like walls, eight rooftop props, awnings in three colours and four kinds of shop sign. A suburban house, a gas station and a kiosk come ready-made for the places where a kit building would look wrong.
6. Add traffic that faces the right way
Cars bring a city to life, but only if they sit in the right lane and face the way they drive. Check that your vehicles come in all four directions of your grid. In isometric view, mirroring a car to get the other direction moves the light to the wrong side, so the vehicles in Isometric City are drawn in four directions rather than flipped, and each one has a lane offset in the JSON that moves it into the right-hand lane. Long vehicles such as buses, delivery trucks and fire engines take two cells.
7. Furnish the streets
Street furniture is what makes a block of buildings feel like a place. Space street lamps evenly along the pavement, put traffic lights at the corners of junctions, and add the small things people expect: benches, bins, hydrants, mailboxes, bollards, planters and street trees. A park with lawns, paths, a fountain, a slide and swings breaks up the grid of buildings. Do not fill every free cell: empty pavement gives the eye somewhere to rest and leaves room for characters to walk.
8. Get the draw order right
Tall buildings make draw order more important than in any other setting. Draw all the ground first, cell by cell from the back of the map to the front in order of row plus column, with the road markings on top. Then draw buildings and objects in the same order: a building cell from its ground floor up to its roof, then whatever hangs on it, such as awnings and signs. A car in a lane counts as the cell it is in; when two cars share a cell, draw the one further back first. In Godot 4 a Y Sort node does this for standing objects; in Tiled an object layer with the index draw order works when you add sprites from back to front.
9. Make a night version
A city at night is one of the strongest screenshots a game can have. If every windowed piece has a lit version with the same outline, you can swap pieces to light up the city, then darken everything else with a simple shader that keeps the window and lamp colours bright. The night images on the Isometric City page were made exactly that way from the pack's own sprites.
10. Build and export
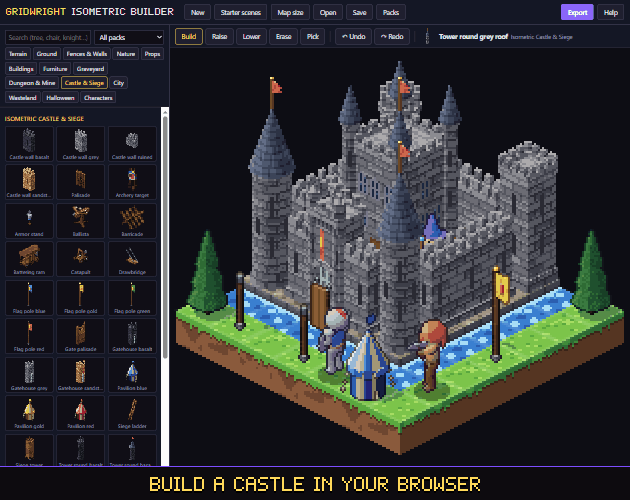
You can lay out a city in your engine's tile editor, in Tiled, or in a dedicated tool. The Gridwright Isometric Builder has every piece of Isometric City inside, stacks storeys at their own height, joins roads and roofs as you place them, switches to night with one key and exports the map as a PNG, an animated GIF, a Tiled map or a Godot 4 scene.
A last word on licences: check that the pack lets you ship it in a commercial game. Gridwright packs can be used in commercial games; you may not resell the files themselves. Packs released from October 28, 2026 ask for a credit: “Art by Gridwright” with a link (each pack’s LICENSE.txt says which applies). See can I use game assets in a commercial game for what that means in practice.