An isometric map looks 3D and plays on a flat grid. That mix goes wrong in ways a top-down map never does: walls hide the player, a tree draws over the character standing in front of it, and a hill that looked fine in the editor covers half the screen. Most of these problems come from decisions made before the first tile goes down. This guide walks through a whole map in order, from the sketch to the file your engine opens.
Start with what the player does there
Write down three things before you open any tool: how the player moves, how far the camera sees, and what the map is for. A tactics battle needs clear cells and height differences that change the fight. A farming map needs open ground with buildings around its edge. A dungeon room needs one way in and something to find.
Then sketch the map from straight above on squared paper, one square per cell. Mark what can be walked on, what blocks the way and where the player enters. If you are still choosing a view for the game, isometric vs top-down covers what each one costs in art and code.
Size matters more than it seems. A square of 20 by 20 cells becomes a diamond on screen, so its corners leave empty triangles on a wide monitor. Decide early what fills them: water, darkness, cliffs or the next part of the level.
Pick one grid and never leave it
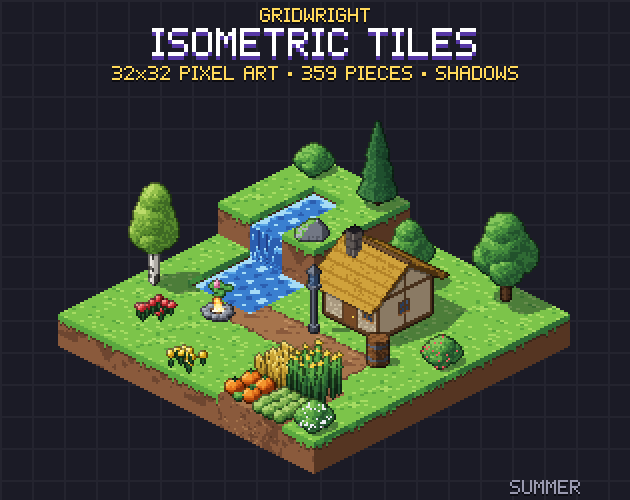
Isometric pixel art usually sits on a 2:1 diamond, twice as wide as it is tall. Our Isometric Tiles pack uses a 32x16 diamond, with blocks 16 pixels high on 32x32 sprites. Whatever you choose, set it once in your engine and your editor and make every sprite sit on it. Godot's docs tell you to set the tile size before you create the atlas, because automatic tile creation depends on it. Every Godot setting for this grid is in our Godot 4 setup guide.
Each object also needs one fixed point: the pixel that touches the ground. In our packs that anchor sits on the back corner of the cell. When two art sources use different anchor rules, their objects seem to float or sink side by side, so check this before you mix them.
Build the ground in layers of height
Work from the biggest shapes to the smallest, and finish each step before you start the next:
- Flat ground first. Fill the whole map with one material, then paint the second one where it belongs.
- Height next. Raise blocks for hills and cliffs, and lower them for rivers and pits. Two or three levels are enough for most maps.
- Ways up. Every height change the player should cross needs a ramp or stairs. Decide which ones stay cliffs.
- Water and paths last. They depend on the shape of the ground around them, so they are the first thing you would redo if a hill moves.
Look at the map through the game's camera after each step. Anything tall on the side nearest the camera covers what stands behind it. A cliff four blocks high at the front of the map can hide a whole row of cells, so keep tall shapes along the back edges and low ones in front.
Keep the player visible
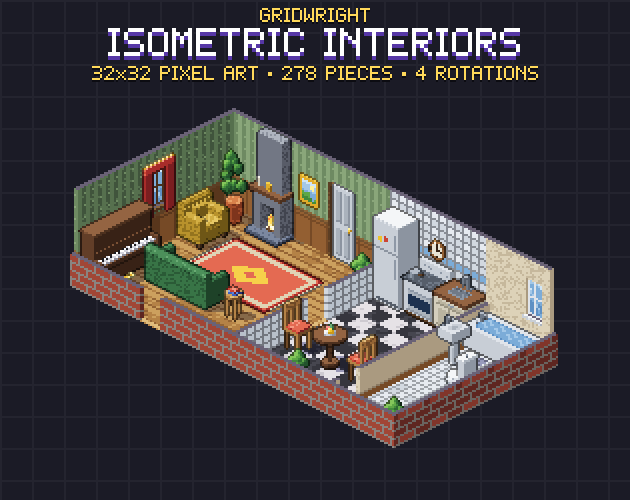
Walls cause the most trouble. Indoors, draw walls only on the back edges of a room, the two sides furthest from the camera, and leave the front open. If a room needs a front wall, use a low cut-away version so the floor behind it stays in view. Isometric Interiors is built around that kind of room. Outdoors, leave a gap of a cell or two behind every building, or fade the building when the player walks behind it, which your game code has to handle.
Test this early with a real character sprite. Walk it along the back of every tall object. If you lose sight of the character for more than a step or two, move the object.
Get the draw order right
Isometric sprites overlap, so they have to draw from back to front. Engines do this by sorting on the position of each sprite's foot. In Godot that means Y sort on the layers, with each tile's Texture Origin set where it touches the ground. Tiled supports isometric maps too, and its object layers hold sprites that are not limited to the tile grid, which helps with tall or odd-sized objects.
Two tests catch most sorting bugs. Walk a character all the way around a tall tree, then around an object two cells wide. Wide objects are the hard case, because one foot point cannot describe them. A common fix is to cut a big building into one-cell slices so each slice sorts on its own.
Dress the map last
Props go in only after the ground, the walls and the draw order all work. Moving a hill later means moving everything that stands on it.
- Group props in small clusters and leave the walking routes clear.
- Keep one light direction for everything, shadows included. Isometric Tiles ships a separate shadow sprite for every tree, prop and building.
- Add something that moves: water, a fire, a flag. A map with no motion reads as a picture.
- Check the map at the zoom the game really uses. Detail you can only see at 4x is wasted.
Where to build it
Three kinds of tool do this job, and each is better at something:
- Your engine's tilemap. Godot's TileMapLayer keeps collisions, terrains and game logic in the same project as the map. It takes the most setup before the first tile goes down.
- Tiled. A free general map editor that works with many engines and lets you attach your own data to anything on the map. You bring a tileset and set it up yourself.
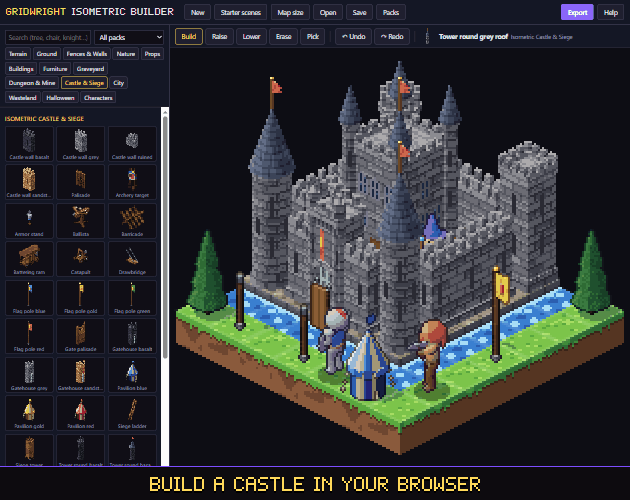
- The Isometric Builder. A map maker in your browser with the pieces already loaded. Blocks stack by their real heights, up to 12 high, and paths, roads and walls join by themselves. It is the quickest way from nothing to a finished picture or a level draft.
The Builder has limits worth knowing. Its Godot and Tiled exports hold the placed sprites in drawing order, so collisions and game logic are yours to add in the engine. The free edition holds the free-sample pieces of each pack and saves PNG pictures with a small mark. The full edition, in Gridwright Studio, opens all 20 isometric packs, 1,160 pieces, and every export. Your own PNGs work in both.
A first map in the Builder
- Open the Isometric Builder and start from a blank map or a starter scene.
- Press B to build, Q to raise blocks and A to lower them. Shift-drag fills a rectangle.
- Add ramps and stairs, then water and paths. Paths join by their corners.
- Place walls, props and a character. L switches to low walls and N shows the map at night.
- Save a PNG. The full edition also exports an animated GIF for your store page, and a Godot 4 scene or Tiled map to carry on in your engine.
Finish one small map before you plan a big one. Walk a character through it, fix what hides it, and you will know the rules your next map has to follow. For themed examples, see the castle and modern city walkthroughs.
Gridwright packs can be used in commercial games; you may not resell the files themselves. Packs released from October 28, 2026 ask for a credit: “Art by Gridwright” with a link (each pack’s LICENSE.txt says which applies). More in can I use game assets in a commercial game.