A castle is the place most fantasy RPGs send the player sooner or later: to meet the king, to fight in the hall, to escape from the dungeon. Outside, a castle is walls and towers. Inside, it is a set of rooms that each need to read at a glance from a fixed isometric camera. This guide walks through planning those rooms on a 32x16 isometric grid: which rooms to build, how to keep the walls from hiding the action, where doors and light go, and how to draw it all in the right order.
Start with the rooms the story needs
Before placing a single tile, list the rooms your quests actually use. A castle that is only corridors feels empty, and one with twenty rooms is a lot of art to fill. Most RPG castles get by with a handful of rooms that each have one clear job:
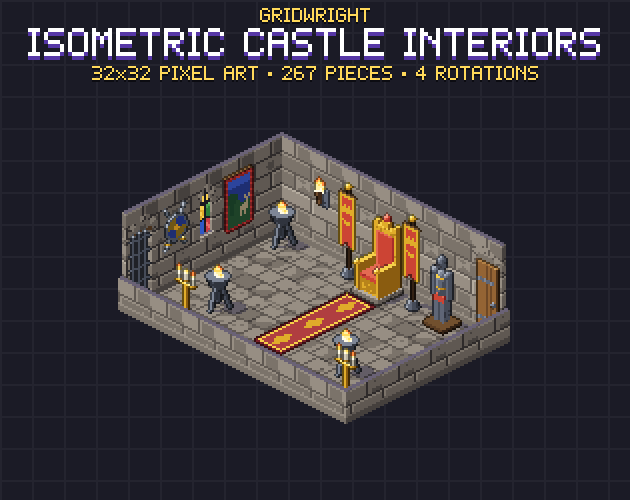
- Throne room: where the player meets the ruler. A throne against the back wall, a runner carpet leading to it, banners and pillars along the sides.
- Great hall: feasts, crowds and fights. One long table in the middle with benches, a hearth on a wall, torches for light.
- Armoury: where guards gear up. Weapon racks and armour stands against the walls, a training dummy in the open.
- Kitchen: barrels, sacks, a butcher table and a cooking hearth with a cauldron.
- Chapel and library: quiet rooms for quest givers, with an altar and pews, bookcases and a reading desk.
- Bedchamber and treasury: a canopy bed for the ruler, chests and gold for the heist quest.
- Dungeon: cell bars you can see through, a cell door, shackles on the wall and straw on the floor.
Give each room its own floor and wall finish so the player knows where they are without a label. In Gridwright Isometric Castle Interiors the throne room uses castle flagstones and dressed ashlar, the hall oak planks and limewash with a red band, the chapel chequered marble, and the dungeon worn flags and wet dungeon stone.
Use cut-away walls on the side facing the camera
In an isometric view the camera looks over the room from the front. Full-height walls on the two back edges frame the room, but full walls on the front edges would hide everything inside. The usual answer is the cut-away wall: the back walls stand at full height, and the front walls are drawn low, just tall enough to show where the room ends.
On a 32x16 grid a full wall is 48 px tall (three 16 px blocks) and a cut-away wall is 16 px. Where a low wall meets a full one in the same cell, you need a mixed corner piece, or the join looks broken. Plan the camera side first: decide which edges of each room face the viewer, and use low walls there.
Doors, arches and windows
Doors are where rooms connect, so place them where the paths through your castle run, not where they look nice on a sketch. A few rules keep doorways readable:
- Keep the cell in front of a door free of furniture, and the cell behind it too. A chair in a doorway reads as a blocked path.
- Put door leaves in the back walls, where the player sees them open. In the front cut-away walls a simple gap is enough.
- Use the opening to tell the player what is behind it: an oak door for living rooms, an iron-studded door for the armoury or the treasury, a barred cell door in the dungeon, and a portcullis for the way out.
- Windows and arrow slits go on full back walls. Keep tall furniture (bookcases, banners, armour stands) away from the cells in front of them, or the window disappears.
Animated doors make a castle feel alive with very little work. Four frames from closed to open are enough at pixel art sizes; play them forward to open and backward to close. A portcullis works the same way, rising in four steps into the wall above the opening.
Light: fire tells the player where to look
Castles are dark, and in pixel art the brightest pixels pull the eye. Use that. A brazier on each side of a throne, a wall torch beside each door and a burning hearth in the hall show the player the important spots before they read a single line of dialogue. Looping fire at about 8 frames per second is calm enough to sit in the background.
Keep the shadows separate from the art. If every piece of furniture has its own shadow sprite with the same anchor, you can draw the shadows on the floor at the opacity you like, turn them off at night, or skip them for a lighting shader.
Furniture in four rotations
A throne that only faces one way forces you to build every throne room the same way round. Furniture drawn in all four rotations (facing south-west, south-east, north-east and north-west) lets a room face any direction, and it lets pews face the altar instead of the camera. Drawing each rotation on its own, instead of mirroring, keeps the light coming from the same side on every view.
Long pieces such as a three-cell feast table, benches and straw beds only need two ways, along each axis of the grid.
Draw order on an isometric grid
The one technical rule that makes or breaks an isometric interior is the draw order. Draw all floor tiles first, then rugs and runners, then the shadow sprites, then everything else back to front by col + row. On each cell, draw its walls, then its door leaf and wall decor, then the furniture whose front cell it is. A piece that covers several cells is drawn before the walls and furniture of the cells just in front of it. The placement formula and this order are written out in our isometric tilemap guide for Godot 4.
Connect the inside to the outside
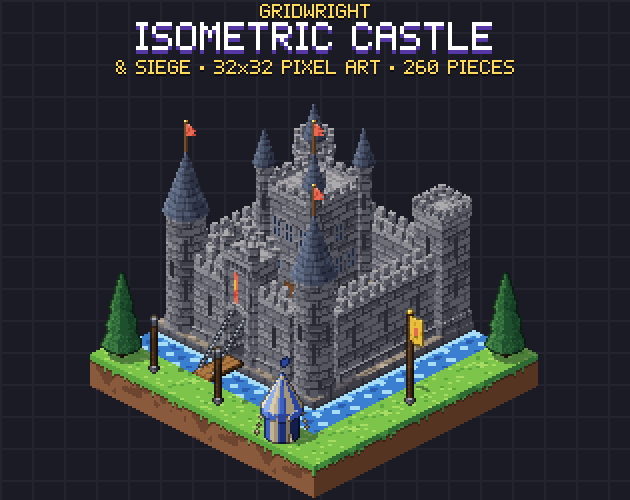
Players notice when the castle they walked into is a different size from the rooms they find inside. Build the outside and the inside on the same grid and the same scale. The walls, towers, gatehouses and siege engines of Isometric Castle & Siege share the 32x16 grid with the castle interior kit, and the furniture of Isometric Interiors fits the same walls when a quest needs a village house or a tavern. Our guide to building an isometric castle map covers the outside.
Try the layout before you code it
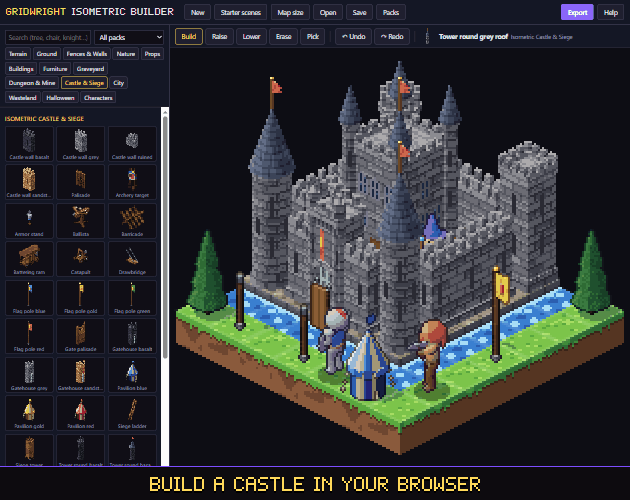
Rooms are easier to judge on screen than on paper. The Gridwright Isometric Builder runs in a browser with all our isometric packs: lay out a throne room and a dungeon, check that doors are clear and windows are not blocked, then export the map as PNG, GIF, a Tiled map or a Godot scene.
A quick checklist
- Every room has one job and its own floor and wall finish.
- Back walls full height, front walls cut away, mixed corners where they meet.
- Doorways clear on both sides; door types match what is behind them.
- Fire marks the important spots: throne, doors, hearth.
- Furniture faces where people would use it, not the camera.
- Floors, rugs, shadows, then walls and furniture back to front.
Gridwright packs can be used in commercial games; you may not resell the files themselves. Packs released from October 28, 2026 ask for a credit: “Art by Gridwright” with a link (each pack’s LICENSE.txt says which applies). See can I use game assets in a commercial game for the details.